Creating the perfect home theater starts long before you choose your projector or pick out plush recliners. The foundation of any great cinematic experience lies in thoughtful floor plan design that maximizes both comfort and audio-visual performance.
Whether you're converting a spare bedroom or building a dedicated media room from scratch, your floor plan will determine everything from sound quality to viewing angles. A well-designed layout ensures every seat feels like the best seat in the house, while poor planning can leave you with dead zones, awkward sightlines, and frustrated family members.
This guide will walk you through the essential elements of home theater floor plan design, helping you create a space that rivals your favorite cinema while fitting seamlessly into your home's existing structure.
Understanding Your Space Requirements
Before diving into specific layouts, you need to assess your available space realistically. Most home theaters require a minimum of 12 feet by 16 feet to accommodate proper seating distances and equipment placement, though smaller spaces can work with careful planning.
Room Dimensions and Shape
Rectangular rooms typically work best for home theaters, as they provide natural acoustic boundaries and easier furniture arrangement. Square rooms can create audio challenges due to standing waves, while oddly shaped spaces may require creative solutions or professional consultation.
Ceiling Height Considerations
Standard 8-foot ceilings work for most home theaters, but 9-10 feet provides better acoustic performance and allows for tiered seating if desired. Low ceilings can create a cozy atmosphere but may limit your projector options and speaker placement.
Existing Infrastructure
Take inventory of electrical outlets, HVAC vents, windows, and structural elements that cannot be moved. These fixed elements will influence your layout options and may require workarounds in your design.
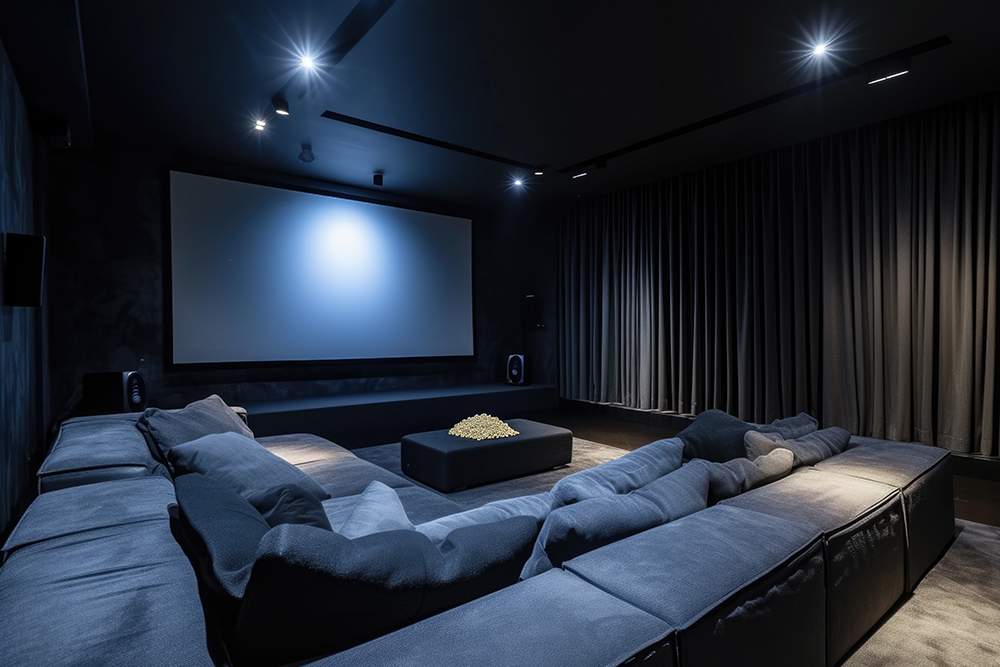
Optimal Seating Arrangements
The seating layout forms the heart of your home theater floor plan. Your arrangement should prioritize comfort while ensuring everyone has an unobstructed view of the screen.
Primary Seating Position
Position your main seating area so viewers sit approximately 1.5 to 2.5 times the screen width away from the display. For a 100-inch screen, this translates to roughly 10-17 feet of distance. This "sweet spot" provides immersive viewing without causing eye strain.
Multiple Row Configurations
If your space allows for multiple seating rows, elevate the back row by 6-12 inches to prevent heads from blocking the view. Stadium-style seating works well, but even a simple platform can make a significant difference in viewing comfort.
Aisle and Walkway Planning
Leave at least 3 feet of space behind the last row of seating for easy entry and exit. Side aisles should be minimum 2 feet wide, while the main walkway should accommodate 3-4 feet for comfortable passage.
Screen Placement and Viewing Angles
Your screen location determines the entire room's layout, making this decision crucial to your floor plan's success.
Wall Selection
Choose a wall that allows for proper seating distance and minimal light interference. The screen wall should be perpendicular to any windows and positioned to avoid reflections from light sources.
Height and Angle Considerations
Mount your screen so the center sits at eye level when viewers are seated. For most arrangements, this means the screen's center should be 42-48 inches from the floor. Avoid extreme viewing angles that exceed 30 degrees from the screen's center.
Projector vs. Television Placement
Televisions mount directly to the wall, simplifying placement decisions. Projectors require either ceiling mounting or rear shelf placement, both of which impact your floor plan. Ceiling-mounted projectors need clear sightlines to the screen, while shelf-mounted units require dedicated furniture or built-in storage.
Audio Equipment Integration
Sound quality can make or break your home theater experience, and your floor plan must accommodate proper speaker placement.
Surround Sound Layout
A 5.1 surround system requires speakers positioned around your seating area: front left and right speakers flanking the screen, a center channel above or below the screen, and rear speakers behind the seating area. Plan your furniture arrangement to avoid blocking these audio pathways.
Subwoofer Considerations
Subwoofers are less directional than other speakers, offering more placement flexibility. However, corner placement often provides the best bass response, so design your layout with potential subwoofer locations in mind.
Equipment Storage
Audio-visual receivers, gaming consoles, and streaming devices need ventilation and easy access for maintenance. Plan for equipment storage that keeps devices hidden but accessible, whether through built-in cabinetry or dedicated furniture.
Creating Flow and Functionality
Your home theater should feel integrated with your home's overall design while maintaining its specialized function.
Entry and Exit Points
Position seating to allow easy access without disrupting other viewers. Avoid layouts that require people to walk in front of the screen or crawl over furniture to reach their seats.
Lighting Control
Plan for layered lighting that includes ambient lighting for general use, task lighting for cleaning or setup, and accent lighting for ambiance. Dimmer switches should be easily accessible from the main seating area.
Storage Solutions
Include storage for movies, games, remotes, and accessories within easy reach of seating areas. Built-in storage maintains clean lines, while furniture with hidden storage provides flexibility.
Common Layout Mistakes to Avoid
Learning from others' mistakes can save you time and frustration during your design process.
Inadequate Seating Distance
Sitting too close to large screens causes eye strain and reduces the immersive experience. Resist the temptation to maximize screen size at the expense of proper viewing distance.
Poor Traffic Flow
Avoid layouts that require people to walk through the viewing area to access other parts of your home. This creates disruptions and limits your theater's usability.
Ignoring Acoustic Considerations
Hard surfaces create audio reflections that muddy sound quality. Plan for acoustic treatments or soft furnishings that absorb sound reflections, especially on walls parallel to your speakers.
Professional Design Consultation
While many homeowners can successfully design their own home theater floor plans, complex projects often benefit from professional expertise.
When to Seek Help
Consider professional consultation for rooms with unusual shapes, existing structural challenges, or when you want to integrate advanced features like automated lighting or motorized seating.
Working with Specialists
An experienced audio visual company in Central Florida can help you optimize your floor plan for both performance and aesthetics. They bring knowledge of local building codes, product availability, and installation requirements that can prevent costly mistakes.
Bringing Your Design to Life
A well-planned home theater floor plan sets the stage for countless hours of entertainment and family bonding. By considering seating arrangements, screen placement, audio requirements, and traffic flow during the design phase, you'll create a space that performs beautifully and feels comfortable for years to come.
Remember that the best floor plan balances technical requirements with your family's specific needs and preferences. Take time to visualize how you'll use the space, and don't hesitate to revise your plan as needed.
If you're looking for an audio visual company in Central Florida, contact Axiom Integration today to get a quote and turn your home theater vision into reality.